Hi, I'm Ryan Schweighart, founder of Whole Hart Impact, where I help businesses grow leveraging...
Last week, I attended ZapConnect, which is an annual event hosted by Zapier. One of their newer features is "Transfer". Basically, this new feature allows a user to transfer data one time or multiple times. In this specific use case, I'm going to share how I was able to transfer data from a Google Sheet to a third part software, eImmigration, via Zapier's webhook functionality.
Let's jump in.
Step 1: Ensure your Google Sheet is populated
Ensure your Google Sheet is populated with a header row of data.
Step 2: Go to the transfers section in your Zapier account
Locate and navigate to the Transfers section on the left side within your Zapier account. This link should take you there: https://zapier.com/app/transfers
Step 3: Select new transfer
Toward the top right, select new transfer and select whether to perform a one-time or recurring data transfer. In this example, we are performing a one-time data transfer.
Step 4: Select your source app and destination app
In the source app, select Google Sheets. For source data, select spreadsheet row.
In the destination app, select webhooks by Zapier. For the destination action, I am going to be updating records in the third party software, eImmigration. Therefore, I will select PUT as the action.
Step 5: Select or connect your Google Sheets account
For this step, you will select your Google Sheets account that contains your spreadsheet. If it's not available, select the connect a new account link.
Step 6: Select your spreadsheet and worksheet
This step is pretty straightforward. Select the corresponding spreadsheet and worksheet your data is located. Note your data must have column headers.
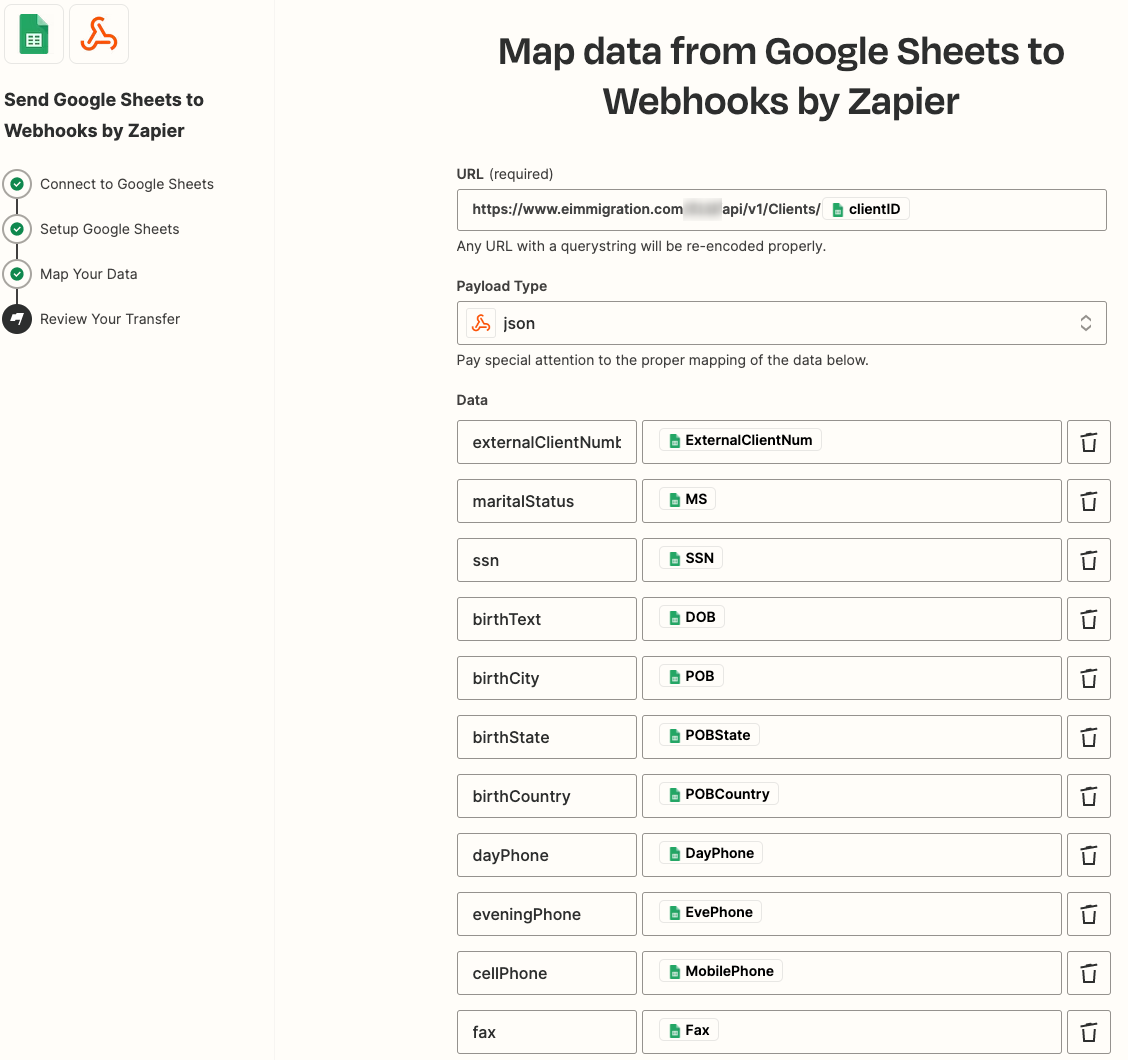
Step 7: Set up your API request
In this step, you'll need to refer to the API documentation. Most documentation can be found by googling "developer docs {name of software}". In the case of eImmigration, the docs were sent separately once the API was setup.
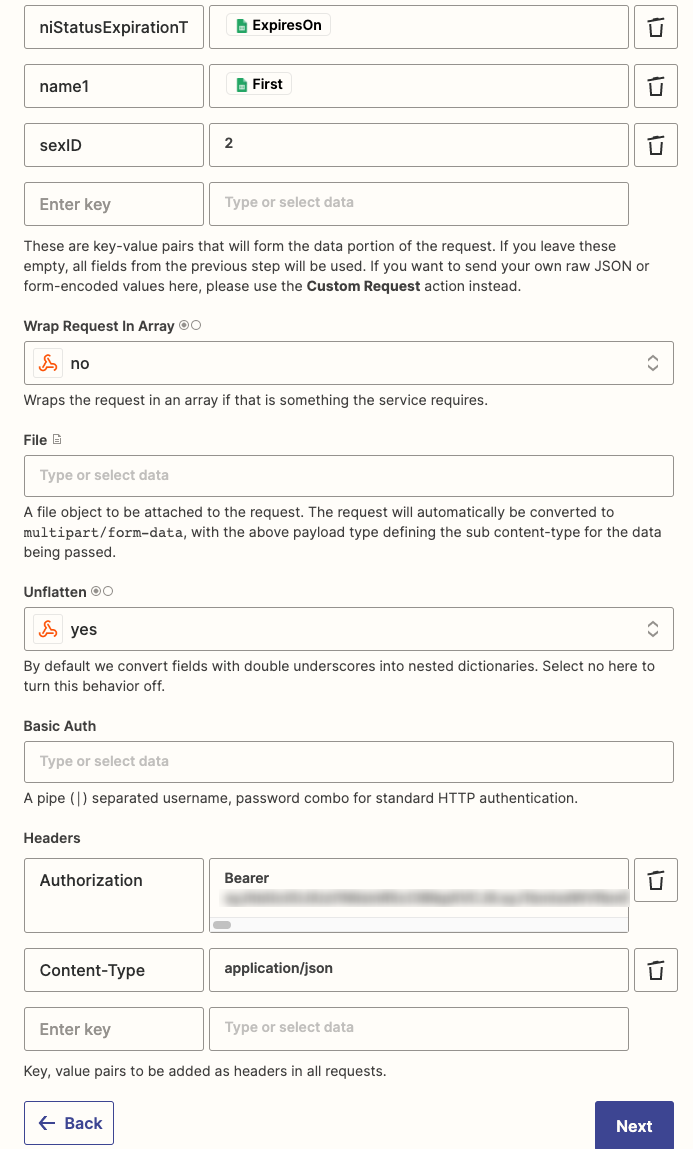
Use the screenshots below as a guide, but please reach out to me if you have any questions about your setup.
Once this step is complete, click Next. Then, click Looks good.
Step 8: Filter your data, if needed
Zapier offers the ability to filter your data based on the existing fields using AND/OR logic. I could see this being very handy. In our example, we want to import all of the data. So, I'll use the check box in the top left of the table to select all rows.
Step 9: Send it!
Zapier gives you one more screen to review highlighting the number of tasks the transfer will use. When you're ready, click Send data.
That's it! Now you've transferred data via a webhook from a Google Sheet to the app of your choice.
Note, I ran into a roadblock when trying to send data for this specific example. It kept saying 'bad request' as the error. After trying a number of things, I saw in the API docs that the first name (name1) is required. Once I added that, it worked as expected.
Let me know if you have any questions. I'd love to hear your use cases.
My contact info is below.