Hello, I’m Ryan Schweighart, founder of Whole Hart Impact, where I help organizations grow without...
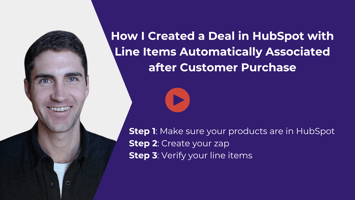
In this WH1nsight, I will show you how to use a deal in HubSpot to trigger an automation (zap) in Zapier to generate folders and bring over templates in SharePoint.
Software you'll need:
- SharePoint
- HubSpot
- Zapier
When would you use this?
Let's say you have a new client. You move that new client in your deal pipeline in HubSpot to 'Closed Won'. Upon doing so, it will generate standard folders you use with all clients as well as bring over some templates you use. We can leverage values from HubSpot in the naming of our folders and files.
Here's the end result:

The Breakdown
How did I do that? As always, let's begin with the overview. This is what the automation looks like in Zapier:
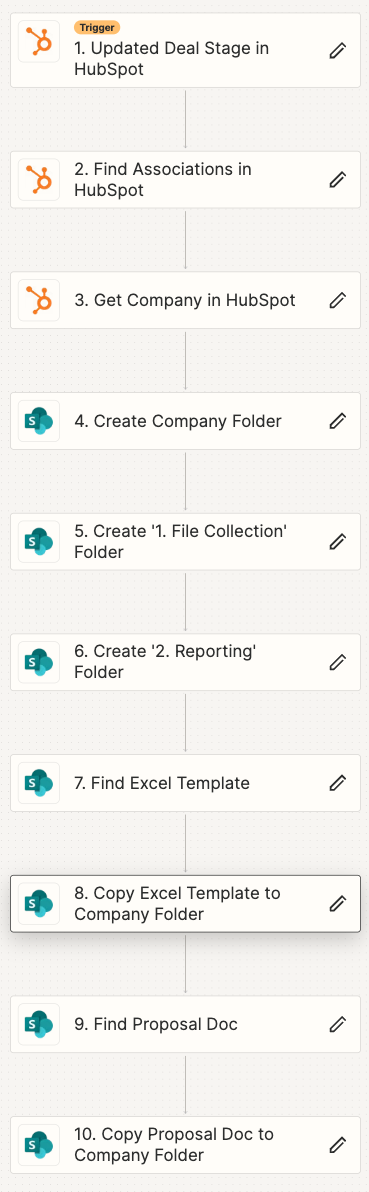
The trigger I used for the automation in Zapier is the 'updated deal stage' event for HubSpot.

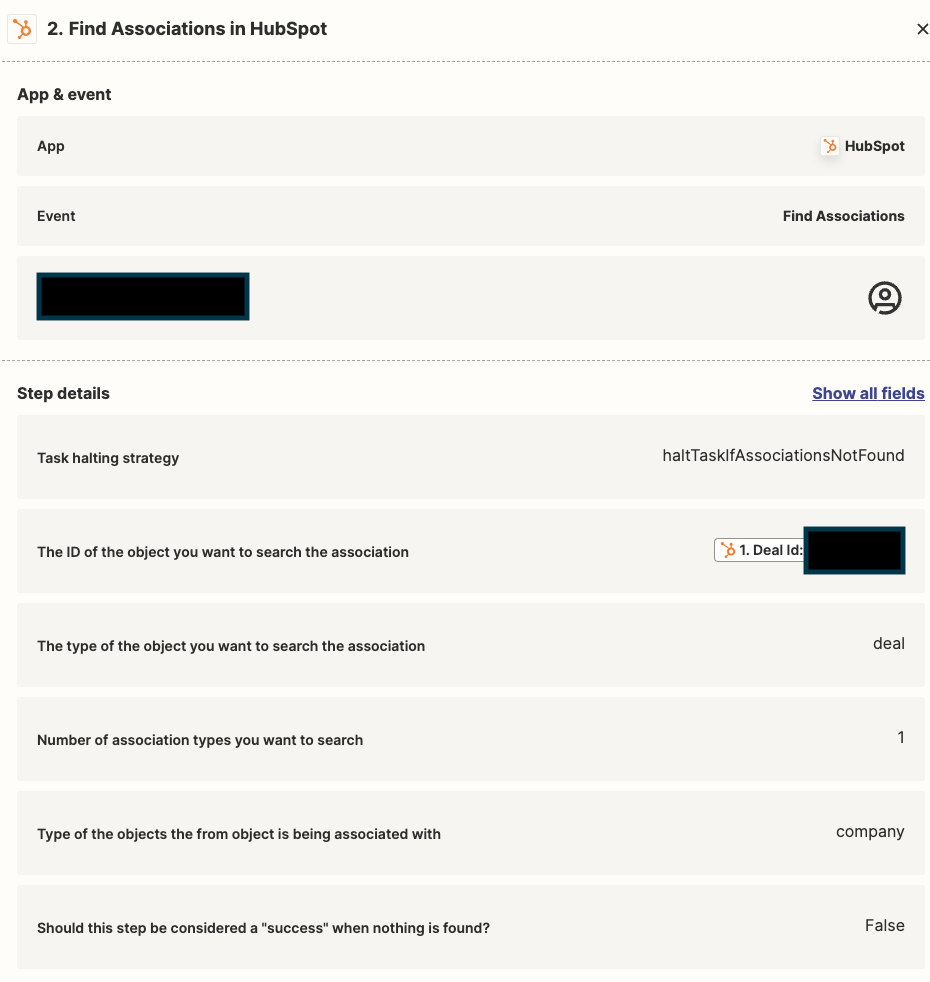
We are going to want to use the company name in some of our folder and file renaming so the next step gets us the HubSpot id of the company associated to the deal.
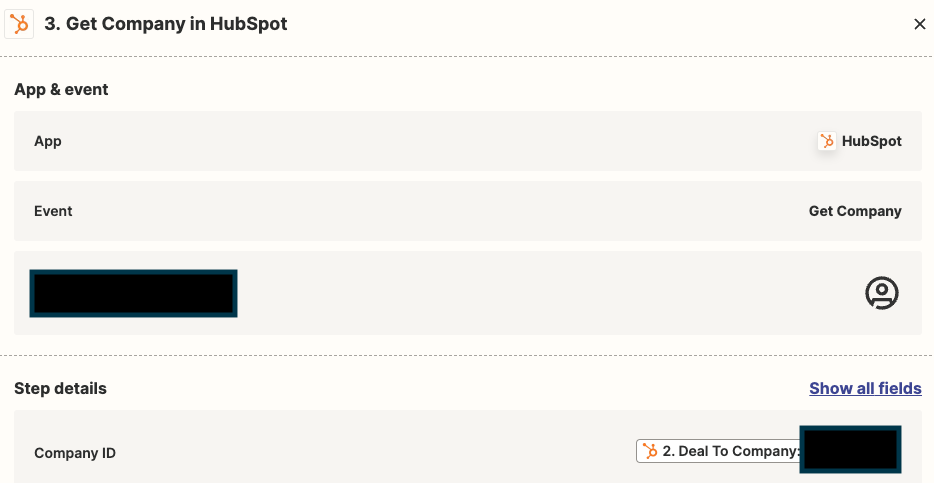
Then, we will use the get company step to get the company name plus any other properties we might want to use in subsequent zap steps. We will use the HubSpot id we got from the previous step.
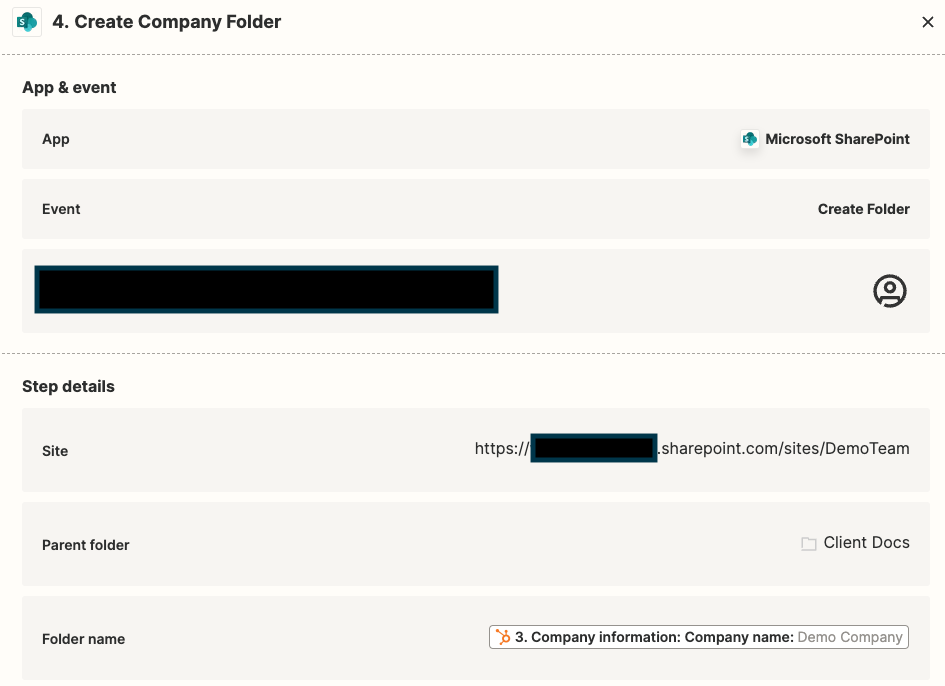
The next step is to create the company folder in SharePoint. For this, we will use the create folder step for SharePoint. The blacked out part is typically your company name. You will see this in your browser's URL bar when you are in your SharePoint site.
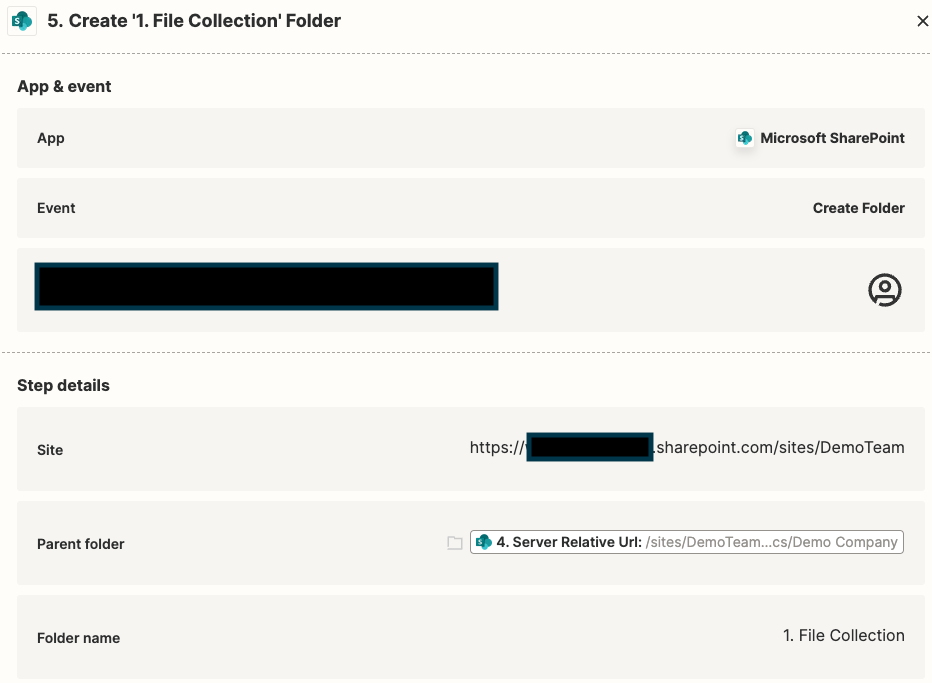
I chose to create some arbitrary subfolders within the newly created company folder. Here's an example of how I set up one of those steps.
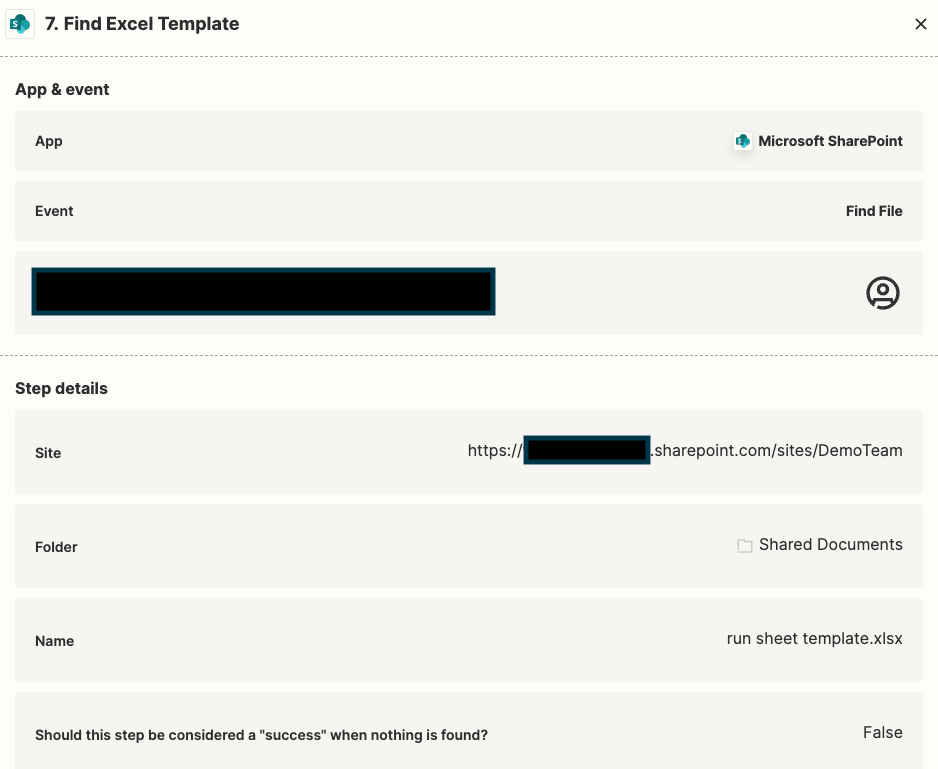
Further, I copied a Word and Excel template into the new location and renamed it. Here's how I completed the Excel template. The Word template is the same, simply adjust the file name. Note there's two steps to this process: (1) find the template and (2) upload the template to the new location.
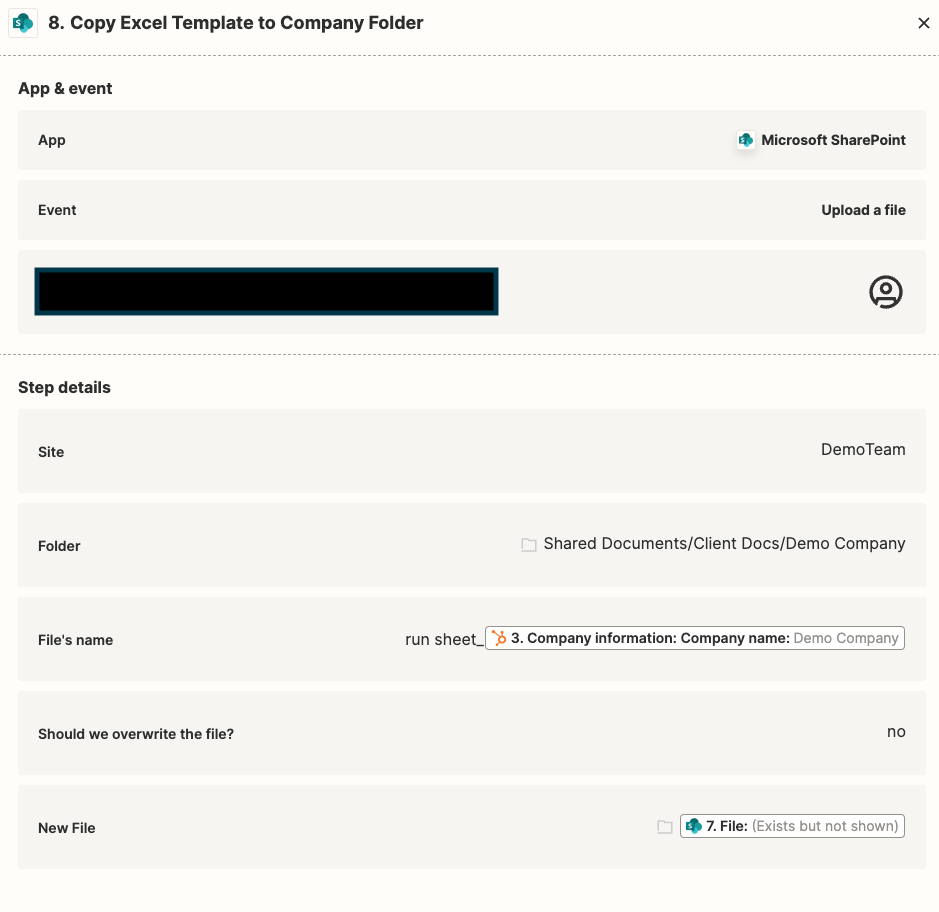
For step 8 screenshot above, notice we are using the upload a file step. As of right now, Zapier does not have a copy file step for SharePoint. If you use Power Automate, this step exists, so you would not need step 7 above.
That's it! You've just added some folders and files automatically to your SharePoint site using Zapier. Depending on your use case, you may need to add some filtering or tweak some of the steps to handle errors. If that's the case, don't hesitate to reach out to me. My contact info is at the bottom of this page.
To advancing your impact!